Where to start - putting it back on the road

Got a customizing or restoration project? Post your progress pictures and updates here

Moderator: rztom

Message
Author
PaulGreen
- - - - -
- - - - -
Posts: 289
Joined: Wed Aug 22, 2007 6:58 am
Location: Grimsby, NE Lincs, England.

#121 Post by PaulGreen » Sat Jun 09, 2012 9:07 am

Wiring loom - before...

Image

During....

Image

And after....

Image


Not perfect, but better than it was.

I'm curious about something though. All of the through crimps in the loom were wrapped in insulation tape making them a proper gooey mess. Is this how they left the factory? I know it's not recommended to use insulation tape for this.

Cheers,
Paul.

Dubsey
- - - - -
- - - - -
Posts: 981
Joined: Sun Nov 05, 2006 6:10 pm
Location: Essex, England

#122 Post by Dubsey » Sat Jun 09, 2012 3:22 pm

Did the same as you
totally dis mantled the oem loom
mine was the same, joints wrapped in tape
I also used a larger earth cable, heatshrink and solder
Mediocrity is a sin !

PaulGreen
- - - - -
- - - - -
Posts: 289
Joined: Wed Aug 22, 2007 6:58 am
Location: Grimsby, NE Lincs, England.

#123 Post by PaulGreen » Sat Jun 09, 2012 5:37 pm

Is the larger earth cable necessary or were you just being cautious? I thought there were ample earthing points around the bike, I'm always willing to take advice though.

Where I broke into the loom I've used heat shrink crimps, the joints which were good have just been wrapped in self amalgamating tape. Some of the sublooms (?) have been wrapped in loom tape where appropriate.

I've just fitted the loom and switched the ignition on to the glorious sound of the powervalve servo bursting into life, still waiting for pv cables though (over a month now) so it got a bit confused! Lights and horn etc all seem to be working ok.

I've managed to get all silencers off and both upper exhausts need welding at the mounting points.

After that it's just the minor issue of splitting the carbs and removing all of those seized phillips screws!

Cheers,
Paul.

Dubsey
- - - - -
- - - - -
Posts: 981
Joined: Sun Nov 05, 2006 6:10 pm
Location: Essex, England

#124 Post by Dubsey » Sat Jun 09, 2012 6:17 pm

Although I used the oem loom
it was only a basis, plugs etc
I use modern R1 switchgear, relays and HID lights
The larger earth (possibly 1mm or 1.5mm ?) runs front to back with take offs at the relevant points solder and heat shrunk
Mediocrity is a sin !

PaulGreen
- - - - -
- - - - -
Posts: 289
Joined: Wed Aug 22, 2007 6:58 am
Location: Grimsby, NE Lincs, England.

#125 Post by PaulGreen » Tue Jun 12, 2012 5:06 pm

Hi,

So I'm back on to the exhausts, i Want to remove 40,000 miles of carbon from them. I was planning doing it the old school method with the oxyacetylene torch....

http://www.youtube.com/watch?v=R_J7sADP ... re=related

I'll probably be a little less "gung-ho", maybe even wear some long sleeves!

Has anybody done this? Does it give good results?

I'm concerned about doing the upper exhausts because I can't see any way of replacing the baffle material - assuming there's some in there?

And, to replace the baffles in the lower exhausts is it just a case of drilling out the rivets at the ends of the silencers?

Any advice is appreciated.

Cheers,
Paul.

PaulGreen
- - - - -
- - - - -
Posts: 289
Joined: Wed Aug 22, 2007 6:58 am
Location: Grimsby, NE Lincs, England.

#126 Post by PaulGreen » Thu Jun 28, 2012 4:42 pm

I knew I should have left the old paint on!

Image

I think the mice have been at 'em!

Cheers,
Paul.

User avatar
zomaardan
- - - - -
- - - - -
Posts: 266
Joined: Sun Sep 26, 2010 3:15 pm
Location: Amsterdam

#127 Post by zomaardan » Thu Jun 28, 2012 5:54 pm

Awesome project sir.


If i do the pipes like that i know the cops will show up, i always do it with riding it hard.


Today i did melt my chainguard, when i did stop the smell was alarming.
And that's all I have to say about that.

http://www.youtube.com/watch?v=vG8UJZzYHDs" onclick="window.open(this.href);return false;
http://www.youtube.com/watch?v=yHFsoHd0nZI" onclick="window.open(this.href);return false;
http://www.youtube.com/watch?v=JJ5pCjnMQQg" onclick="window.open(this.href);return false;
http://www.youtube.com/watch?v=OyZfNKHPRs8" onclick="window.open(this.href);return false;

rd84
- - - - -
- - - - -
Posts: 1618
Joined: Thu Nov 17, 2005 7:12 am
Location: Leicestershire, UK

#128 Post by rd84 » Fri Jun 29, 2012 5:51 am

Hi Paul,

In the 1980's caustic soda was the favoured method of cleaning two stroke exhausts out - You would bung one end up and pour the solution in and leave it for several days. It might take two or three applications. However you must leave the pipes in a safe well ventilated place away from animals and children and you must wear googles and protective clothing - if you get it in your clothing or on your skin wash with lots of water immediately - as a minimum wear latex gloves and goggles. If you can't get it from a supermarket try an hardware store or the chemist.

BTW in the 1980's we didn't wear any safety equipment - we were just careful ! :smile:

Also of interest - I've used quality two stroke oils since I bought my bike in 1984 and it still doesn't need a de-coke - just nice dry thin grey deposit inside the system - amazing when I think back to my RD400 whose exhausts and ports were full of black oily carbon.

Do be careful if you use caustic soda though - it can get hot and spit a bit - but if you're sensible there is no reason not to use it.
I think you'll need to keep the soda away from the alloy silencers - perhaps you could experiment with some scrap aluminium to see what happens ? - I would suggest you try asking on the forum for further advice on this.

Cheers
Paul
PaulGreen wrote:Hi,

So I'm back on to the exhausts, i Want to remove 40,000 miles of carbon from them. I was planning doing it the old school method with the oxyacetylene torch....

http://www.youtube.com/watch?v=R_J7sADP ... re=related

I'll probably be a little less "gung-ho", maybe even wear some long sleeves!

Has anybody done this? Does it give good results?

I'm concerned about doing the upper exhausts because I can't see any way of replacing the baffle material - assuming there's some in there?

And, to replace the baffles in the lower exhausts is it just a case of drilling out the rivets at the ends of the silencers?

Any advice is appreciated.

Cheers,
Paul.

PaulGreen
- - - - -
- - - - -
Posts: 289
Joined: Wed Aug 22, 2007 6:58 am
Location: Grimsby, NE Lincs, England.

#129 Post by PaulGreen » Fri Jun 29, 2012 9:51 am

Thanks for that.

However, I've cleaned them using the oxy torch at work - seems to have done a good job.
The next problem is to sort all the holes that have been exposed from the grit blasting.

Cheers,
Paul.

PaulGreen
- - - - -
- - - - -
Posts: 289
Joined: Wed Aug 22, 2007 6:58 am
Location: Grimsby, NE Lincs, England.

#130 Post by PaulGreen » Wed Jul 04, 2012 5:15 pm

Hi,

So I was browsing the eBay forum and noticed a reference to barrysheeisgod's carbs on his ebay listing looking "MINT".

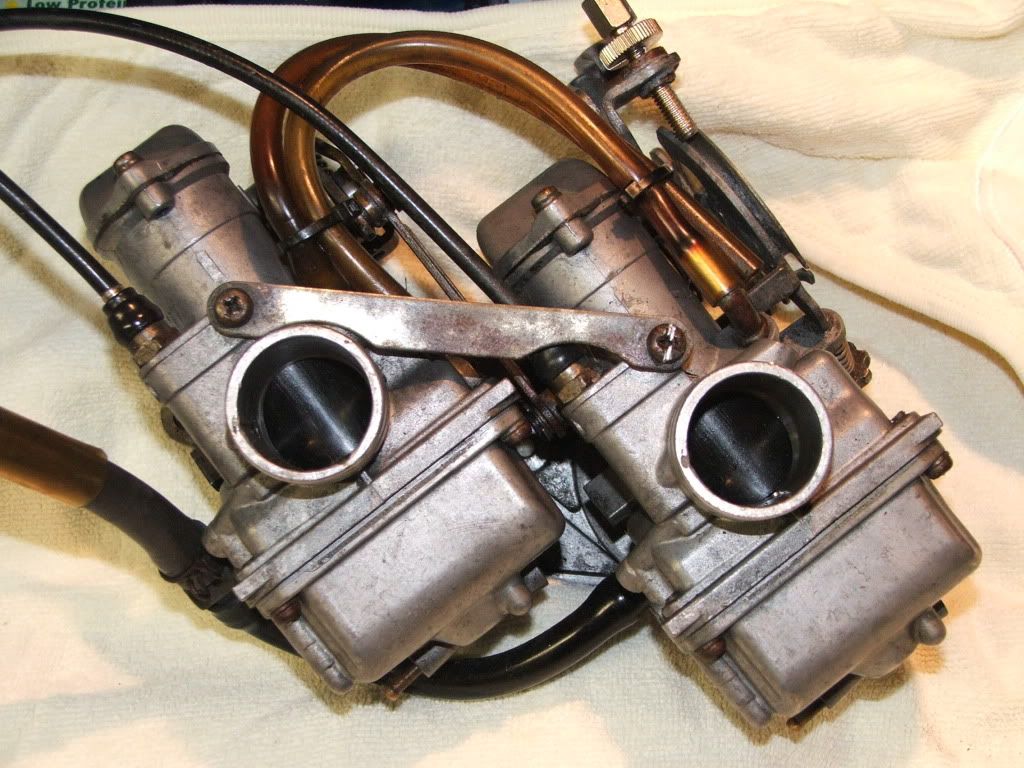
Well, I've used half a dozen toothbrushes and 4 tubes of Autosol on my carbs and was quite pleased with myself.

This is what they looked like before I started:

Image

And then I saw barrysheenisgod's.

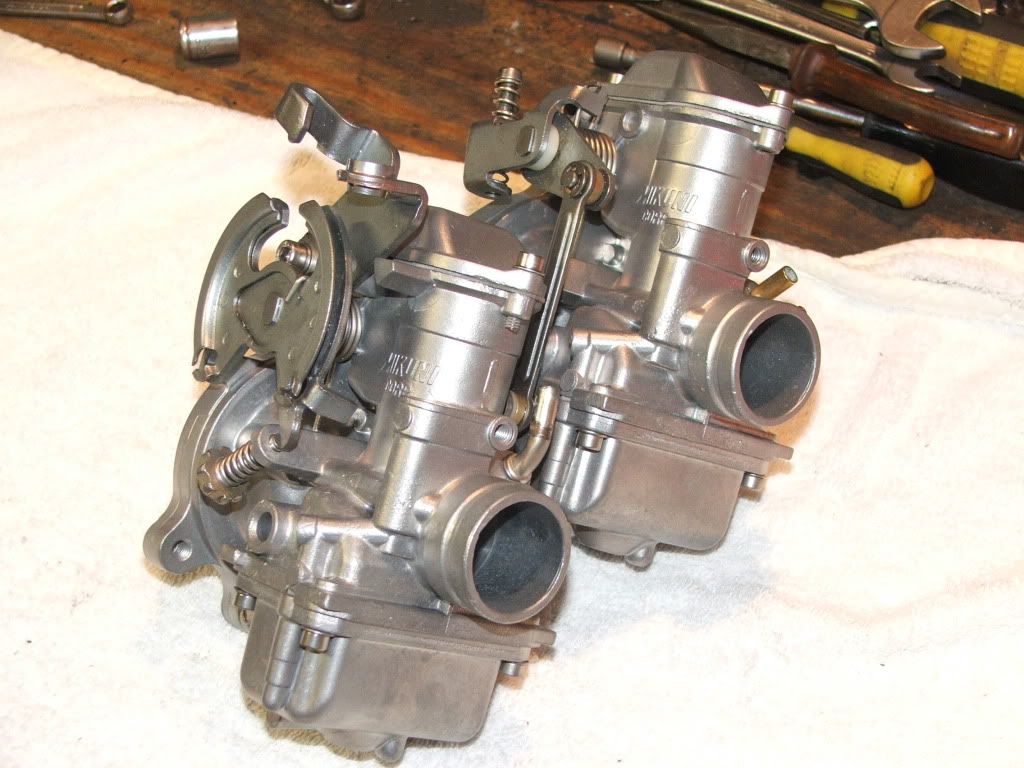
I looked into this vapour blasting lark and found that there's a local bike shop that does it - about a mile from my house. I went to see them on Monday. Stripped the carbs down and dropped them off on Tuesday and got a call at 3 o'clock this afternoon to say they've been vapour blasted and ultrasonically cleaned and were ready to pick up.

They even removed a small pan head screw that was seized in - really can't fault the service.

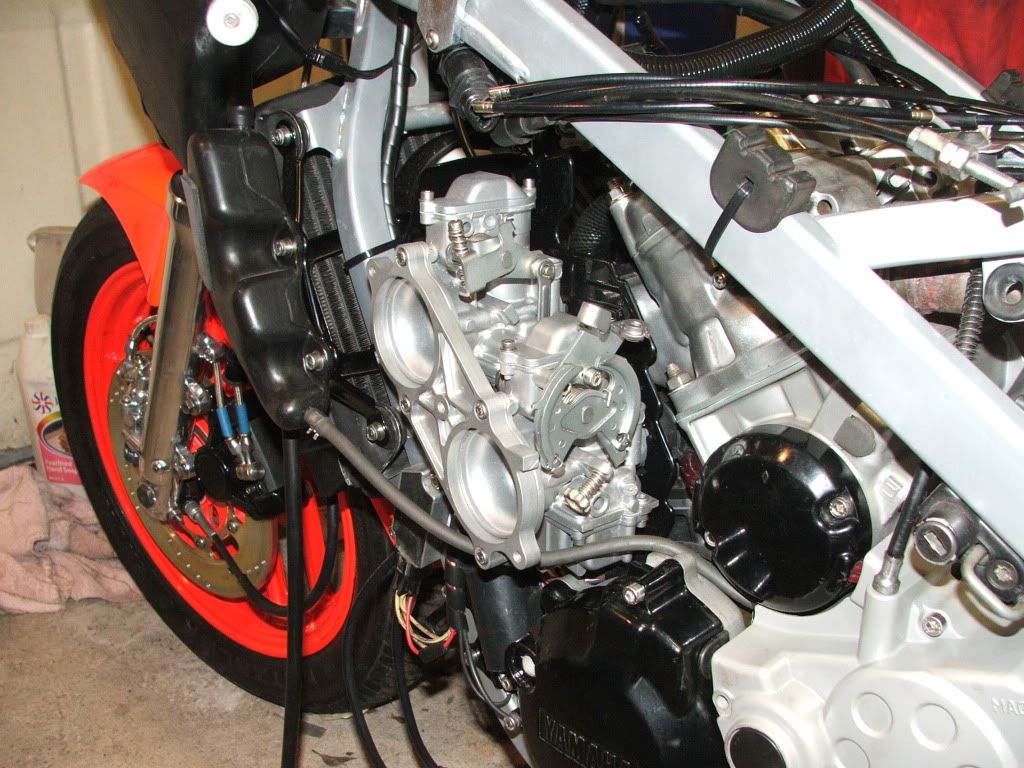
I'm £160 lighter but now I'm the proud owner of these!

Image

Image

Cheers,
Paul.

User avatar
hybrid
Site Admin
Posts: 1203
Joined: Tue Nov 29, 2005 2:33 am
Location: Sydney, Australia
Contact:

#131 Post by hybrid » Wed Jul 04, 2012 7:39 pm

I know I'm a bit late on this, but definitely keep caustic away from ally. It will etch into it.

I dipped my ally parts into caustic soda before anodising them because it cleans the surface and opens the pores for the ink to set in.

http://www.mustangtech.com.au/Content/p ... pid=7.html

User avatar
Ronnie
- - - - -
- - - - -
Posts: 1574
Joined: Wed Nov 16, 2005 7:40 pm
Location: Newcastle upon Tyne, England

#132 Post by Ronnie » Thu Jul 05, 2012 3:34 am

Paul, yours too look MINT! :grin:

PaulGreen
- - - - -
- - - - -
Posts: 289
Joined: Wed Aug 22, 2007 6:58 am
Location: Grimsby, NE Lincs, England.

#133 Post by PaulGreen » Thu Jul 05, 2012 3:51 am

Thanks Ronnie,

It's comments like that that cost people money.
That's £160 you cost me!

Cheers,
Paul.

Blackshaheen
Posts: 652
Joined: Sat Apr 01, 2006 6:55 am

#134 Post by Blackshaheen » Thu Jul 05, 2012 7:13 am

Erm....that's gonna cost me another 160 plus shipping :-(

I totally have to do that to my carbs too.
Thanks...I think...

PaulGreen
- - - - -
- - - - -
Posts: 289
Joined: Wed Aug 22, 2007 6:58 am
Location: Grimsby, NE Lincs, England.

#135 Post by PaulGreen » Thu Jul 05, 2012 11:00 am

Chris Gunster (http://www.chrisgunster.co.uk/) in Grimsby did mine if you're interested.

I think it was well worth the money.

Cheers,
Paul.

Post Reply