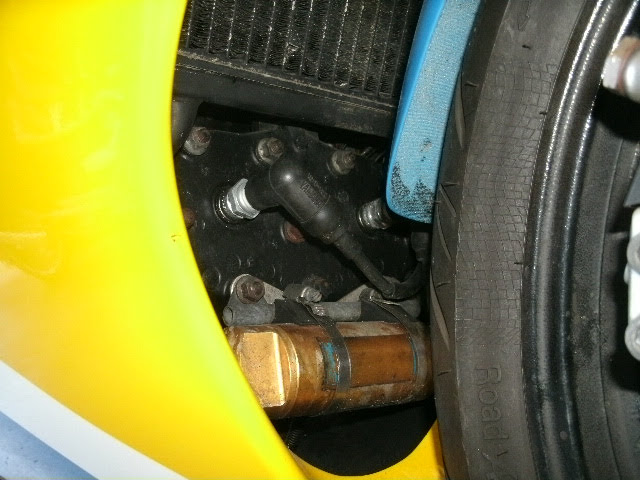
Note as well that the 47X spec bikes don't have the foam rubber strips under the fuel tank but do have the rubber buffers fitted to the first heat shield.
The 1GE spec bikes have the foam rubber under the tank but if you look at the second photo you can see the 1GE spec bikes don't have the rubber buffers fitted to the first heat shield
Operation: MOSQUITO CONTROL BIKE - Florida RZ500 Project (52X)
Moderator: rztom
-
jackson.40

- *****

- Posts: 2328
- Joined: Fri Dec 30, 2005 7:01 pm
- Location: Cambridge,UK
-
TwoStrokeNut
- Posts: 585
- Joined: Tue Nov 20, 2012 5:12 pm
- Location: Florida,USA
Re: Operation: MOSQUITO CONTROL BIKE - Florida RZ500 Project (52X)
Thanks for the additional input.jackson.40 wrote: ↑Wed Jan 16, 2019 9:24 am Note as well that the 47X spec bikes don't have the foam rubber strips under the fuel tank but do have the rubber buffers fitted to the first heat shield.
The 1GE spec bikes have the foam rubber under the tank but if you look at the second photo you can see the 1GE spec bikes don't have the rubber buffers fitted to the first heat shield
My 52X spec bike did not have the rubber buffers on the front heat shield when I bought it. Not sure if the bike ever had them or if they got lost along the way. I added some, just because it looked like it would keep the heat shield from rattling around with engine vibration.
I think I will add a 1/8" (3mm) spacer under the the rear tank mount because it seems a bit too stresssed with the shorter mount in there. I have to force the front of the tank down to insert the bolt at the steering head. 1/4" (6mm) was the approximate difference I saw between bracket heights, but it seemed a bit too loose with the taller mount so I will split the difference.
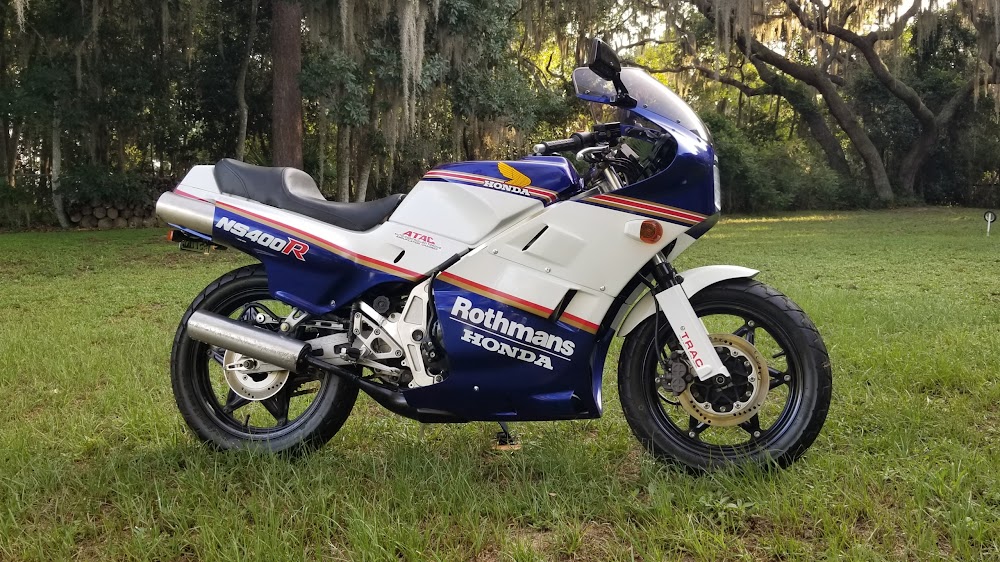
Project bike links: NS400R - TRIPLE THREAT // RZ500 - MOSQUITO CONTROL BIKE // RZ350 - REVIVAL
'72 H1-500/'75 H1-500/'85 RZ350/'85 NS400R/'01 DR650/'07 FJR1300/'18 Tiger 1200
'72 H1-500/'75 H1-500/'85 RZ350/'85 NS400R/'01 DR650/'07 FJR1300/'18 Tiger 1200
-
TwoStrokeNut
- Posts: 585
- Joined: Tue Nov 20, 2012 5:12 pm
- Location: Florida,USA
Re: Operation: MOSQUITO CONTROL BIKE - Florida RZ500 Project (52X)
Service C56 – Add quick release to rear fuel tank mount...
Just a quick update… I decided to make a thin spacer out of aluminum so the front tank didn’t have to strain to insert the front bolt. I used the unused 52X mount to serve as a template. The tank fit is to my liking now.
Picture 481

Just a quick update… I decided to make a thin spacer out of aluminum so the front tank didn’t have to strain to insert the front bolt. I used the unused 52X mount to serve as a template. The tank fit is to my liking now.
Picture 481
Project bike links: NS400R - TRIPLE THREAT // RZ500 - MOSQUITO CONTROL BIKE // RZ350 - REVIVAL
'72 H1-500/'75 H1-500/'85 RZ350/'85 NS400R/'01 DR650/'07 FJR1300/'18 Tiger 1200
'72 H1-500/'75 H1-500/'85 RZ350/'85 NS400R/'01 DR650/'07 FJR1300/'18 Tiger 1200
-
TwoStrokeNut
- Posts: 585
- Joined: Tue Nov 20, 2012 5:12 pm
- Location: Florida,USA
Re: Operation: MOSQUITO CONTROL BIKE - Florida RZ500 Project (52X)
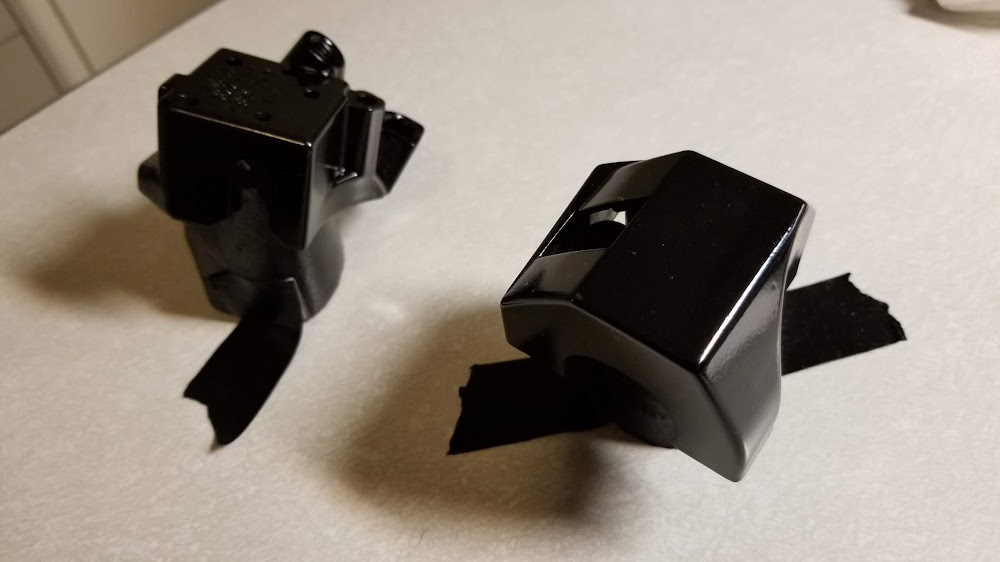
Service E52 – Repaint LH Switchgear and add white lettering...
If you recall, it is my spare RZ350 switchgear that was used during my troubleshooting of the turn signal system. Even though it functioned properly at the time, I decided to fully disassembly and clean every switch inside while it was apart for the paint job. Take a couple pictures before you take it apart if your memory is aged like mine. Even after a couple short days, I needed a bit of help remembering exactly how each little bit fit in.
Here is what I started with.
Picture 482

Here are a couple internal shots. I don’t remember the RZ500 switchgear having the translucent plastic cover when I had it apart for its cleaning even though the 350 and 500 share the same part numbers. I guess something got lost along the way.
Picture 483

Picture 484

I purchased some semi-gloss Rust-oleum black paint for the job, but it came out a little glossier than I expected. I’m not going for show winning OEM looks here, so it will do fine… just pointing it out. It is time to let them dry for a few days before applying the lettering. Luckily, there are always plenty of other projects to keep me out of trouble while the paint dries!
Picture 485

After taking every switch apart, cleaning them, and re-greasing upon assembly, here is the switch assembly awaiting lettering. For the faded plastic knobs, I sanded them with some ultra-fine sandpaper, scraped out the old white paint in the letter grooves, and re-applied new white paint.
Picture 486

I bought this lettering decal set from ebay, which arrived reasonable quickly from the UK. It has everything I need and then some for this 52X spec bike. I’ll order a second one for my RZ350 as soon as I find out they work okay.
Picture 487

Picture 488

You, like I was, may be wondering the format of the individual labels. This photo should explain it better. Each is a separate pre-cut decal and I used my knife tip to get them off and also to apply them to the switchgear. You can see the spots of the missing ones that were used on this 52X spec bike.
Picture 489

Applying the decals was really quite easy.
Picture 490

Here are some close-up photos. I think my screw-up with the glossier-than-should-be black paint actually worked to my advantage… the sheen of the decals closely match it.
Picture 491

Picture 492
And I will leave you with a shot comparing before and after with my spare switchgear. The one I repainted actually started out much worse than the one pictured. Font of the new lettering is a bit bolder than OEM, so that may be an issue with some of you.
Picture 493

E52 Total Cost: US$22.00 (Decal set, Semi-gloss paint)
If you recall, it is my spare RZ350 switchgear that was used during my troubleshooting of the turn signal system. Even though it functioned properly at the time, I decided to fully disassembly and clean every switch inside while it was apart for the paint job. Take a couple pictures before you take it apart if your memory is aged like mine. Even after a couple short days, I needed a bit of help remembering exactly how each little bit fit in.
Here is what I started with.
Picture 482
Here are a couple internal shots. I don’t remember the RZ500 switchgear having the translucent plastic cover when I had it apart for its cleaning even though the 350 and 500 share the same part numbers. I guess something got lost along the way.
Picture 483
Picture 484
I purchased some semi-gloss Rust-oleum black paint for the job, but it came out a little glossier than I expected. I’m not going for show winning OEM looks here, so it will do fine… just pointing it out. It is time to let them dry for a few days before applying the lettering. Luckily, there are always plenty of other projects to keep me out of trouble while the paint dries!
Picture 485
After taking every switch apart, cleaning them, and re-greasing upon assembly, here is the switch assembly awaiting lettering. For the faded plastic knobs, I sanded them with some ultra-fine sandpaper, scraped out the old white paint in the letter grooves, and re-applied new white paint.
Picture 486
I bought this lettering decal set from ebay, which arrived reasonable quickly from the UK. It has everything I need and then some for this 52X spec bike. I’ll order a second one for my RZ350 as soon as I find out they work okay.
Picture 487
Picture 488
You, like I was, may be wondering the format of the individual labels. This photo should explain it better. Each is a separate pre-cut decal and I used my knife tip to get them off and also to apply them to the switchgear. You can see the spots of the missing ones that were used on this 52X spec bike.
Picture 489
Applying the decals was really quite easy.
Picture 490
Here are some close-up photos. I think my screw-up with the glossier-than-should-be black paint actually worked to my advantage… the sheen of the decals closely match it.
Picture 491
Picture 492
And I will leave you with a shot comparing before and after with my spare switchgear. The one I repainted actually started out much worse than the one pictured. Font of the new lettering is a bit bolder than OEM, so that may be an issue with some of you.
Picture 493
E52 Total Cost: US$22.00 (Decal set, Semi-gloss paint)
Last edited by TwoStrokeNut on Wed Jan 23, 2019 9:52 pm, edited 1 time in total.
Project bike links: NS400R - TRIPLE THREAT // RZ500 - MOSQUITO CONTROL BIKE // RZ350 - REVIVAL
'72 H1-500/'75 H1-500/'85 RZ350/'85 NS400R/'01 DR650/'07 FJR1300/'18 Tiger 1200
'72 H1-500/'75 H1-500/'85 RZ350/'85 NS400R/'01 DR650/'07 FJR1300/'18 Tiger 1200
-
TwoStrokeNut
- Posts: 585
- Joined: Tue Nov 20, 2012 5:12 pm
- Location: Florida,USA
Re: Operation: MOSQUITO CONTROL BIKE - Florida RZ500 Project (52X)
Service E51 – Repaint RH Switchgear and add white lettering...
Here is what I started with. It was fully functional but needed some cosmetics.
Picture 494

Here is a close-up of the weathered labels. They were nearly gone.
Picture 495

Here are the internals. There was only one simple switch to clean up and lube on this assembly.
Picture 496

This was the result after a quick spray with the same semi-gloss paint that was still too glossy (I wanted them to at least match, even if too glossy).
Picture 497
I cleaned the internals and put it back together. Luckily the little “OFF” decal on the red switch was in great shape yet. Some light sanding with some ultra-fine sandpaper brought back the red color in the switch, not like new, but better and consistent.
Picture 498

Here it is with the white lettering on.
Picture 499

Picture 500

Here is an overall view with both switchgear finished up and back on the bike. I’m happy with the results, even though the black isn’t exactly the perfect sheen. It gives it a very fresh look. The only problem is, now other things around it look even more dingy. I had to add repainting the top triple clamp to my work list. And then after that, I’m sure I will need to repaint the brake lever perch. And then… It never ends!!
Picture 501

E51 Total Cost: US$0.00 (Accounted for during LH Switchgear job)
Here is what I started with. It was fully functional but needed some cosmetics.
Picture 494
Here is a close-up of the weathered labels. They were nearly gone.
Picture 495
Here are the internals. There was only one simple switch to clean up and lube on this assembly.
Picture 496
This was the result after a quick spray with the same semi-gloss paint that was still too glossy (I wanted them to at least match, even if too glossy).
Picture 497
I cleaned the internals and put it back together. Luckily the little “OFF” decal on the red switch was in great shape yet. Some light sanding with some ultra-fine sandpaper brought back the red color in the switch, not like new, but better and consistent.
Picture 498
Here it is with the white lettering on.
Picture 499
Picture 500
Here is an overall view with both switchgear finished up and back on the bike. I’m happy with the results, even though the black isn’t exactly the perfect sheen. It gives it a very fresh look. The only problem is, now other things around it look even more dingy. I had to add repainting the top triple clamp to my work list. And then after that, I’m sure I will need to repaint the brake lever perch. And then… It never ends!!
Picture 501
E51 Total Cost: US$0.00 (Accounted for during LH Switchgear job)
Project bike links: NS400R - TRIPLE THREAT // RZ500 - MOSQUITO CONTROL BIKE // RZ350 - REVIVAL
'72 H1-500/'75 H1-500/'85 RZ350/'85 NS400R/'01 DR650/'07 FJR1300/'18 Tiger 1200
'72 H1-500/'75 H1-500/'85 RZ350/'85 NS400R/'01 DR650/'07 FJR1300/'18 Tiger 1200
Re: Operation: MOSQUITO CONTROL BIKE - Florida RZ500 Project (52X)
Great job again mate, switch gear looks 100 x better for that refresh.
-
TwoStrokeNut
- Posts: 585
- Joined: Tue Nov 20, 2012 5:12 pm
- Location: Florida,USA
Re: Operation: MOSQUITO CONTROL BIKE - Florida RZ500 Project (52X)
Thanks! I feel it was definitely worth the effort. I need to order a second set to do my RZ350 when the time comes.
Project bike links: NS400R - TRIPLE THREAT // RZ500 - MOSQUITO CONTROL BIKE // RZ350 - REVIVAL
'72 H1-500/'75 H1-500/'85 RZ350/'85 NS400R/'01 DR650/'07 FJR1300/'18 Tiger 1200
'72 H1-500/'75 H1-500/'85 RZ350/'85 NS400R/'01 DR650/'07 FJR1300/'18 Tiger 1200
-
TwoStrokeNut
- Posts: 585
- Joined: Tue Nov 20, 2012 5:12 pm
- Location: Florida,USA
Re: Operation: MOSQUITO CONTROL BIKE - Florida RZ500 Project (52X)
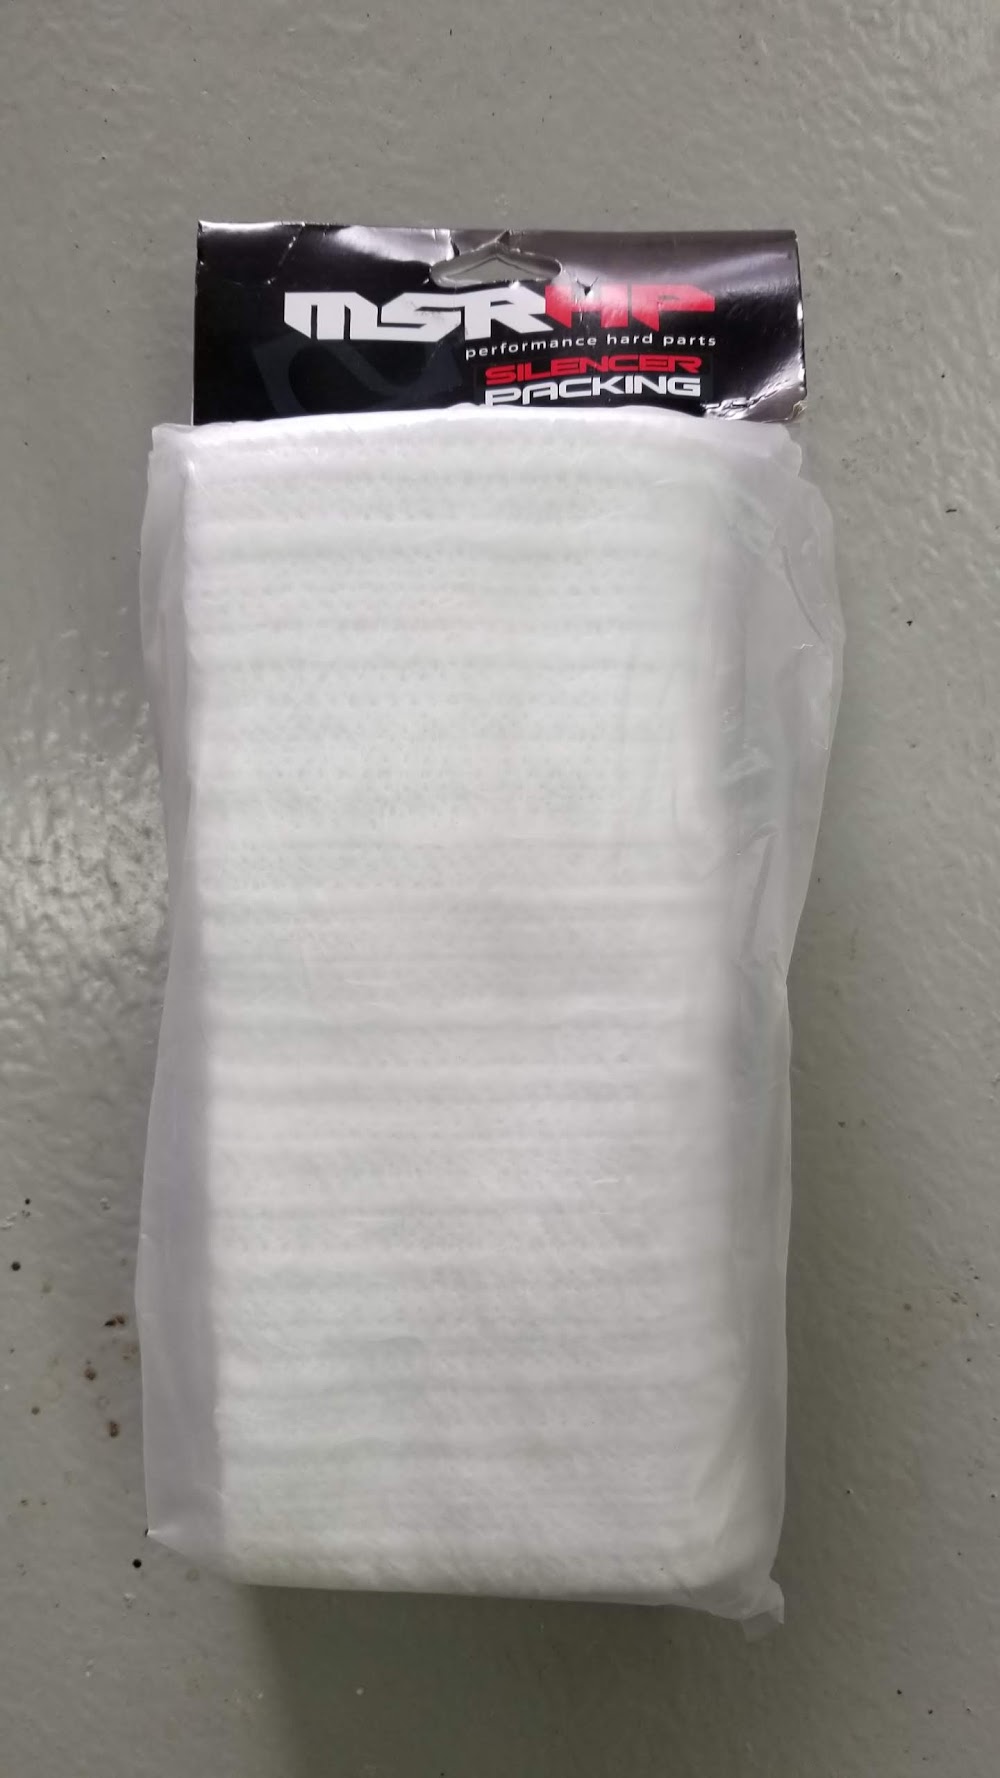
Service M53 – Inspect and repack lower silencers...
Six years ago, without even looking inside the silencers, I bought this repacking material. I didn’t record the cost of it back then, but current prices are about $12.
Picture 502
I have Tommy Crawford chambers in case anyone is wondering. I can’t seem to find any info on them lately and undoubtedly, they are no longer produced. I don’t really have a comparison because this is the only RZ500 I’ve ridden, but I was impressed by the low and mid-range power of the engine with everything else stock. Top end seems plenty strong too. They are lightweight (supposedly 30 lbs lighter than OEM) and actually sound really good. I can’t fault them whatsoever and they seem like a great choice for the way I will be riding this bike (mixture of casual and crazy riding).
It turns out the packing material purchase was needed since it was crumbling apart when I pulled out the baffles.
Picture 503

Here is a shot looking inside the cans. I doubt it’s even worth cleaning them out because they will look the same in a short time of riding. I later spend a little time getting the end clean where the circlips seat because it is visible when assembled.
Picture 504

Here are the results after a quick cleaning and then repaint of the visible parts (baffles and circlips) with high heat black. Particular attention was paid to cleaning out the baffle perforations so sound attenuation could be maximized.
Picture 505

Here is the freshly painted silencer going back in with the fiberglass material. It looks like that bag is going to be just enough to repack all 4 silencers.
Picture 506

Much better. Those large circlips pushed my biggest pliers to the limit! There is a large O-ring sandwiched in between the baffle and the circlip to prevent the silencer from rattling.
Picture 507

The bottom two silencers are finished and ready for action. I’m sure they will never look this clean again. I will do the upper two silencers the next time the tail bodywork comes off.
Picture 508

M53 Total Cost: US$12.00 (Silencer packing, paint from stock)
Six years ago, without even looking inside the silencers, I bought this repacking material. I didn’t record the cost of it back then, but current prices are about $12.
Picture 502
I have Tommy Crawford chambers in case anyone is wondering. I can’t seem to find any info on them lately and undoubtedly, they are no longer produced. I don’t really have a comparison because this is the only RZ500 I’ve ridden, but I was impressed by the low and mid-range power of the engine with everything else stock. Top end seems plenty strong too. They are lightweight (supposedly 30 lbs lighter than OEM) and actually sound really good. I can’t fault them whatsoever and they seem like a great choice for the way I will be riding this bike (mixture of casual and crazy riding).
It turns out the packing material purchase was needed since it was crumbling apart when I pulled out the baffles.
Picture 503
Here is a shot looking inside the cans. I doubt it’s even worth cleaning them out because they will look the same in a short time of riding. I later spend a little time getting the end clean where the circlips seat because it is visible when assembled.
Picture 504
Here are the results after a quick cleaning and then repaint of the visible parts (baffles and circlips) with high heat black. Particular attention was paid to cleaning out the baffle perforations so sound attenuation could be maximized.
Picture 505
Here is the freshly painted silencer going back in with the fiberglass material. It looks like that bag is going to be just enough to repack all 4 silencers.
Picture 506
Much better. Those large circlips pushed my biggest pliers to the limit! There is a large O-ring sandwiched in between the baffle and the circlip to prevent the silencer from rattling.
Picture 507
The bottom two silencers are finished and ready for action. I’m sure they will never look this clean again. I will do the upper two silencers the next time the tail bodywork comes off.
Picture 508
M53 Total Cost: US$12.00 (Silencer packing, paint from stock)
Project bike links: NS400R - TRIPLE THREAT // RZ500 - MOSQUITO CONTROL BIKE // RZ350 - REVIVAL
'72 H1-500/'75 H1-500/'85 RZ350/'85 NS400R/'01 DR650/'07 FJR1300/'18 Tiger 1200
'72 H1-500/'75 H1-500/'85 RZ350/'85 NS400R/'01 DR650/'07 FJR1300/'18 Tiger 1200
-
TwoStrokeNut
- Posts: 585
- Joined: Tue Nov 20, 2012 5:12 pm
- Location: Florida,USA
Re: Operation: MOSQUITO CONTROL BIKE - Florida RZ500 Project (52X)
Service C51/C52/C53 – Add decals... (Part 1 of ?)
This bike has always looked unfinished to me. Now with nearly all the mechanicals back operational and to my liking, it was time to put a bit more effort on the aesthetics. Ultimately, I want to repaint this bike yellow and black to match my RZ350 shown at the beginning of this thread, but for now, some decals will be added for that finishing touch.
Here is what I’m thinking for the tail. A matching YAMAHA decal will be added in the white stripe to compliment the two at the front of the bike. From all angles, the manufacturer will be evident. As a homage to Kenny Roberts, I found a decal that might look nice on the top yellow area. The decal is not rectangular as it appears, but cut tight around the image. I think it will go nicely with the YAMAHA below it since widths are relatively the same. I would apply it with it the bottom edge parallel to the white stripe, despite the original intention for it to be applied at a slight angle.
Picture 509

I had a little black pin-striping tape left over from another job so I fastened some on temporarily just to see what it looks like flanking the white stripe. In my opinion, it compliments it nicely and gives some much needed contrast between the white and yellow. There are compound curves that will make tape application challenging in some spots, so I’m still assessing if this is a feasible option.
Picture 510

I ordered a sheet of Ohlins decals to replace the faded ones on the swingarm and the missing one on the reservoir. I might as well advertise that fine Swedish engineering, right?
Picture 511

Picture 512

Picture 513
I had to wait about 3 weeks to receive these decals because they came from Malta. I’m accustomed to Amazon Prime’s 2-day delivery so that 3 weeks seemed like an ETERNITY! Their quality appears to be okay but proof will be seen after they are installed. I went with a single black color on the “V4” decal because I thought it would look better on the yellow background. Unfortunately, I still paid full 2-color price for the black on black version. I would have also ordered the “RZ500” without the white shadowing, but that wasn’t an option. So again, I paid extra for a 2-color decal despite not really wanting the feature. Two Kenny Roberts signatures were ordered for the slim chance I decide to use them somewhere. They were inexpensive, so I figured why not get them. But with the Kenny decal going on the top of the tail, I doubt I will use them on this bike. To be honest, I like the more legible signatures on the RZ350 better anyway. A curved “YAMAHA” logo was ordered to see what it looks like below the windshield. I doubt I will use those either on this bike because there are already logos in close proximity on the sides of the bike.
The important thing now is they are here. I can begin temporarily taping them on to see where they fit and what looks best. I will try to follow OEM locations if possible, but I’m not afraid to juggle them around if the aftermarket bodywork warrants it.
Picture 514

C51/C52/C53 Total Cost: US$58.00 (Decals)
This bike has always looked unfinished to me. Now with nearly all the mechanicals back operational and to my liking, it was time to put a bit more effort on the aesthetics. Ultimately, I want to repaint this bike yellow and black to match my RZ350 shown at the beginning of this thread, but for now, some decals will be added for that finishing touch.
Here is what I’m thinking for the tail. A matching YAMAHA decal will be added in the white stripe to compliment the two at the front of the bike. From all angles, the manufacturer will be evident. As a homage to Kenny Roberts, I found a decal that might look nice on the top yellow area. The decal is not rectangular as it appears, but cut tight around the image. I think it will go nicely with the YAMAHA below it since widths are relatively the same. I would apply it with it the bottom edge parallel to the white stripe, despite the original intention for it to be applied at a slight angle.
Picture 509
I had a little black pin-striping tape left over from another job so I fastened some on temporarily just to see what it looks like flanking the white stripe. In my opinion, it compliments it nicely and gives some much needed contrast between the white and yellow. There are compound curves that will make tape application challenging in some spots, so I’m still assessing if this is a feasible option.
Picture 510
I ordered a sheet of Ohlins decals to replace the faded ones on the swingarm and the missing one on the reservoir. I might as well advertise that fine Swedish engineering, right?
Picture 511
Picture 512
Picture 513
I had to wait about 3 weeks to receive these decals because they came from Malta. I’m accustomed to Amazon Prime’s 2-day delivery so that 3 weeks seemed like an ETERNITY! Their quality appears to be okay but proof will be seen after they are installed. I went with a single black color on the “V4” decal because I thought it would look better on the yellow background. Unfortunately, I still paid full 2-color price for the black on black version. I would have also ordered the “RZ500” without the white shadowing, but that wasn’t an option. So again, I paid extra for a 2-color decal despite not really wanting the feature. Two Kenny Roberts signatures were ordered for the slim chance I decide to use them somewhere. They were inexpensive, so I figured why not get them. But with the Kenny decal going on the top of the tail, I doubt I will use them on this bike. To be honest, I like the more legible signatures on the RZ350 better anyway. A curved “YAMAHA” logo was ordered to see what it looks like below the windshield. I doubt I will use those either on this bike because there are already logos in close proximity on the sides of the bike.
The important thing now is they are here. I can begin temporarily taping them on to see where they fit and what looks best. I will try to follow OEM locations if possible, but I’m not afraid to juggle them around if the aftermarket bodywork warrants it.
Picture 514
C51/C52/C53 Total Cost: US$58.00 (Decals)
Project bike links: NS400R - TRIPLE THREAT // RZ500 - MOSQUITO CONTROL BIKE // RZ350 - REVIVAL
'72 H1-500/'75 H1-500/'85 RZ350/'85 NS400R/'01 DR650/'07 FJR1300/'18 Tiger 1200
'72 H1-500/'75 H1-500/'85 RZ350/'85 NS400R/'01 DR650/'07 FJR1300/'18 Tiger 1200

Re: Operation: MOSQUITO CONTROL BIKE - Florida RZ500 Project (52X)
Ohh exciting! I agree you need these, they will make the bike seem much more finished.
www.2smoked.com
80 XT500 Supermoto!
81 RD350LC Resto
82 RD421LC Hybrid
82 RD250LC '251LC' YPVS
83 RZ350 Resto
84 RZ500 Resto
85 RZ350 F1 Resto
86 RZ350 F2 Resto
86 RZ350 F2 Hybrid
Like Watches? www.PloProf.com & www.DeskDivers.com
80 XT500 Supermoto!
81 RD350LC Resto
82 RD421LC Hybrid
82 RD250LC '251LC' YPVS
83 RZ350 Resto
84 RZ500 Resto
85 RZ350 F1 Resto
86 RZ350 F2 Resto
86 RZ350 F2 Hybrid
Like Watches? www.PloProf.com & www.DeskDivers.com
-
TwoStrokeNut
- Posts: 585
- Joined: Tue Nov 20, 2012 5:12 pm
- Location: Florida,USA
Re: Operation: MOSQUITO CONTROL BIKE - Florida RZ500 Project (52X)
It IS exciting! Next, I need to get the bike standing straight up on a stand in the middle of the room and tape the decals on temporarily. I'm sure I will be walking around the bike a 100 times, viewing the bike from every angle, as I try different arrangements to see what looks the best. I'll be sure to share some of my favorites with you all.
Last edited by TwoStrokeNut on Fri Feb 01, 2019 9:56 am, edited 1 time in total.
Project bike links: NS400R - TRIPLE THREAT // RZ500 - MOSQUITO CONTROL BIKE // RZ350 - REVIVAL
'72 H1-500/'75 H1-500/'85 RZ350/'85 NS400R/'01 DR650/'07 FJR1300/'18 Tiger 1200
'72 H1-500/'75 H1-500/'85 RZ350/'85 NS400R/'01 DR650/'07 FJR1300/'18 Tiger 1200

Re: Operation: MOSQUITO CONTROL BIKE - Florida RZ500 Project (52X)
Enjoy it, that's the fun part of any project
Shake "N" Bake!
-
TwoStrokeNut
- Posts: 585
- Joined: Tue Nov 20, 2012 5:12 pm
- Location: Florida,USA
Re: Operation: MOSQUITO CONTROL BIKE - Florida RZ500 Project (52X)
Project bike links: NS400R - TRIPLE THREAT // RZ500 - MOSQUITO CONTROL BIKE // RZ350 - REVIVAL
'72 H1-500/'75 H1-500/'85 RZ350/'85 NS400R/'01 DR650/'07 FJR1300/'18 Tiger 1200
'72 H1-500/'75 H1-500/'85 RZ350/'85 NS400R/'01 DR650/'07 FJR1300/'18 Tiger 1200
-
TwoStrokeNut
- Posts: 585
- Joined: Tue Nov 20, 2012 5:12 pm
- Location: Florida,USA
Re: Operation: MOSQUITO CONTROL BIKE - Florida RZ500 Project (52X)
Service E06 – Tail light, Revisited...
Since the tail light assembly is… how do I put it kindly… a "cost-effective" China unit with a long delivery time, I figured it would be a good idea to have a spare on hand. After waiting 3 weeks to receive the second one, when I finally saw it, I was reminded of the tiny 22ga lead wires on it and decided to upgrade them to 18ga for reliability. At the same time, I figured I may as well take advantage of the flashing feature it has. People pay good money for brake light modulators, you know.
This is the finished result. The triangular light serves primarily as the tail light while the long bar unit serves as the brake light. The yellow wire can be plugged into the double bullet connector if I want the tail light to flash when the brake is activated. Brake modulators are pretty obnoxious, but I think they do add a certain level of safety. If I have a fellow rider behind me, however, I would be inclined to disable it, just to stay on the good side of a friend.
Picture 515

Note that in the spare tail light at the top of the picture is ready to plug-n-play, complete with connector pins and bullet terminal installed.
E06 Total Cost: US$10.00 (Spare tail light, wiring terminals from stock)
Since the tail light assembly is… how do I put it kindly… a "cost-effective" China unit with a long delivery time, I figured it would be a good idea to have a spare on hand. After waiting 3 weeks to receive the second one, when I finally saw it, I was reminded of the tiny 22ga lead wires on it and decided to upgrade them to 18ga for reliability. At the same time, I figured I may as well take advantage of the flashing feature it has. People pay good money for brake light modulators, you know.
This is the finished result. The triangular light serves primarily as the tail light while the long bar unit serves as the brake light. The yellow wire can be plugged into the double bullet connector if I want the tail light to flash when the brake is activated. Brake modulators are pretty obnoxious, but I think they do add a certain level of safety. If I have a fellow rider behind me, however, I would be inclined to disable it, just to stay on the good side of a friend.
Picture 515
Note that in the spare tail light at the top of the picture is ready to plug-n-play, complete with connector pins and bullet terminal installed.
E06 Total Cost: US$10.00 (Spare tail light, wiring terminals from stock)
Project bike links: NS400R - TRIPLE THREAT // RZ500 - MOSQUITO CONTROL BIKE // RZ350 - REVIVAL
'72 H1-500/'75 H1-500/'85 RZ350/'85 NS400R/'01 DR650/'07 FJR1300/'18 Tiger 1200
'72 H1-500/'75 H1-500/'85 RZ350/'85 NS400R/'01 DR650/'07 FJR1300/'18 Tiger 1200
-
TwoStrokeNut
- Posts: 585
- Joined: Tue Nov 20, 2012 5:12 pm
- Location: Florida,USA
Re: Operation: MOSQUITO CONTROL BIKE - Florida RZ500 Project (52X)
Service C62 – Add toolbox...
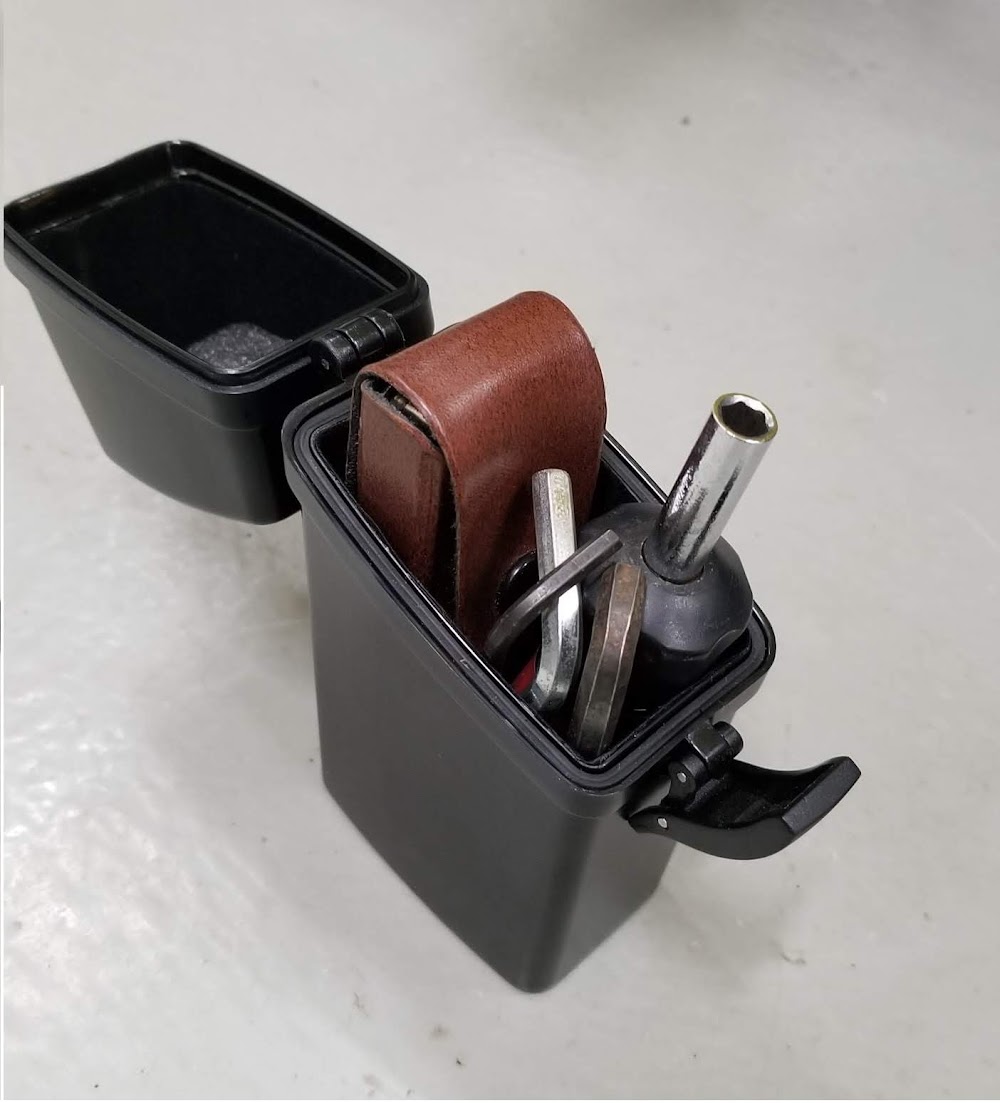
On the first couple of test rides, I realized there was a need for on-bike stowage of registration and insurance papers, rather than carrying them in my jacket pocket. Like most of you, I have multiple jackets and the docs are sure to be in the wrong jacket pocket when the authorities ask for them. LOL. I also thought having space for a few basic tools would be nice as well.
What I found to perform this function is this little waterproof case. Size is 2.75 x 5.25 x 1.30” (70 x 133 x 33mm). There is room for documents, a multi-bit screwdriver, a multi-tool, and some hex key wrenches. I will at least be able to remove bodywork and hopefully perform some minor roadside repairs, if needed, with the on-board tools.
Picture 516
The space between the engine and fairing on the left seemed like a convenient spot. It is immediately behind the elephant ear so I don’t think it will further restrict cooling air flowing from flowing through this area. Rather than adding more holes to mount it, there were two fairing screws that could be used. The lower attachment point already has a rubber grommet attached to it in this picture.
Picture 517

I searched my aluminum scrap bins and found suitable pieces to make the bracket.
Picture 518

Picture 519

Here it is mounted in place.
Picture 520

I placed the latch on the front-facing side, out of sight, to deter someone from snooping in the box. Another benefit of mounting it that way is better access to the carb idle screw and cables with the lid open. Complete removal of the box for better engine access occurs by removing the single top fairing nut.
Picture 521

Picture 522

To make the bracket “disappear” back there, I shot it with a quick coat of black paint.
Picture 523

C62 Total Cost: US$13.00 (Toolbox, aluminum from stock)
On the first couple of test rides, I realized there was a need for on-bike stowage of registration and insurance papers, rather than carrying them in my jacket pocket. Like most of you, I have multiple jackets and the docs are sure to be in the wrong jacket pocket when the authorities ask for them. LOL. I also thought having space for a few basic tools would be nice as well.
What I found to perform this function is this little waterproof case. Size is 2.75 x 5.25 x 1.30” (70 x 133 x 33mm). There is room for documents, a multi-bit screwdriver, a multi-tool, and some hex key wrenches. I will at least be able to remove bodywork and hopefully perform some minor roadside repairs, if needed, with the on-board tools.
Picture 516
The space between the engine and fairing on the left seemed like a convenient spot. It is immediately behind the elephant ear so I don’t think it will further restrict cooling air flowing from flowing through this area. Rather than adding more holes to mount it, there were two fairing screws that could be used. The lower attachment point already has a rubber grommet attached to it in this picture.
Picture 517
I searched my aluminum scrap bins and found suitable pieces to make the bracket.
Picture 518
Picture 519
Here it is mounted in place.
Picture 520
I placed the latch on the front-facing side, out of sight, to deter someone from snooping in the box. Another benefit of mounting it that way is better access to the carb idle screw and cables with the lid open. Complete removal of the box for better engine access occurs by removing the single top fairing nut.
Picture 521
Picture 522
To make the bracket “disappear” back there, I shot it with a quick coat of black paint.
Picture 523
C62 Total Cost: US$13.00 (Toolbox, aluminum from stock)
Project bike links: NS400R - TRIPLE THREAT // RZ500 - MOSQUITO CONTROL BIKE // RZ350 - REVIVAL
'72 H1-500/'75 H1-500/'85 RZ350/'85 NS400R/'01 DR650/'07 FJR1300/'18 Tiger 1200
'72 H1-500/'75 H1-500/'85 RZ350/'85 NS400R/'01 DR650/'07 FJR1300/'18 Tiger 1200